Place your fence
After your photo opens, the visualizer asks Where should the fence go? This is step 2 of 3. The line you draw tells the visualizer exactly where to build the fence in your photo.
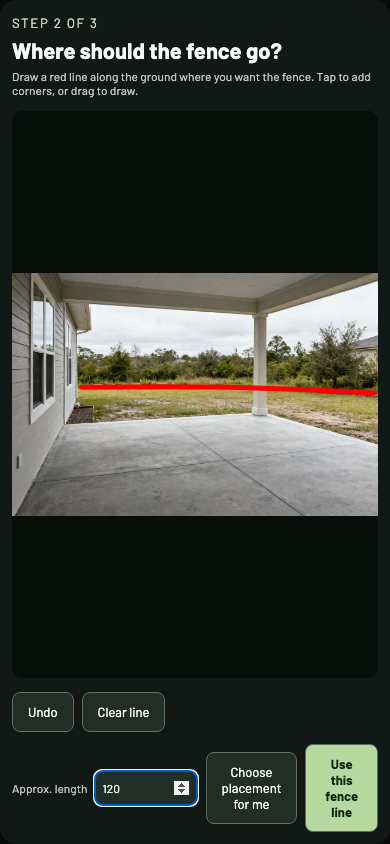
- 1Your photo
Tap corners or drag along the ground to draw the red fence line.
- 2Undo
Remove your last corner or stroke.
- 3Approx. length
Optional. Enter the fence length in feet if you know it.
- 4Choose placement for me
Skip drawing and let the visualizer decide where the fence goes.
- 5Use this fence line
Confirm the line and continue to styles and stains.
Draw the line
- Tap to add corners. Each tap adds a point, and the line joins the points in order. This works well for straight runs and corners.
- Drag to draw. Hold and move your finger or mouse to trace a curve.
Draw along the ground where the posts will stand, not along the top of where the fence will be. Follow the fence from one end to the other, and add a point wherever it turns a corner.
A line needs at least two points. Use this fence line stays unavailable until then.
Fix mistakes
| Control | What it does |
|---|---|
| Undo | Removes the last point or stroke. Select it again to keep stepping back. |
| Clear line | Removes the whole line so you can start over. |
| Back | Appears when you reopen placement for a line you already confirmed. It returns without changes. |
Add the approximate length
If you know the fence length, enter it in feet in Approx. length, from 1 to 5,000. It is optional and does not change the drawing. The number carries into the quote form, where you can still edit it.
Let the visualizer choose
Select Choose placement for me to skip drawing. The visualizer decides where a fence fits in your photo. If the result is not where you want the fence, select Edit fence placement and draw the line yourself.
Change the line later
In the style and stain picker, select Edit fence placement to reopen this step. After you confirm a new line, select a stain again and then Render photo. Each fence line keeps its own previews, so a new line does not replace earlier results.
The red line only tells the visualizer where to build. It is not part of the finished preview, and the before side of the divider shows your original photo without it.