Choose a fence style
After you confirm the fence line, the picker shows Choose a fence style. The style sets how the fence is built: board direction, spacing, overlap, rails, posts and the top line.
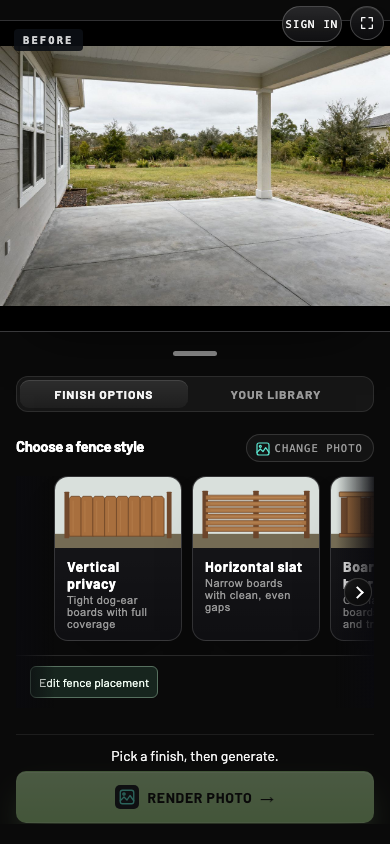
- 1Style card
Open a style to see its stain colors.
- 2Edit fence placement
Reopen the fence line before you render.
- 3Change photo
Go back and start with a different yard photo.
The five styles
| Style | What it looks like |
|---|---|
| Vertical privacy | Tight dog-ear boards with full coverage. |
| Horizontal slat | Narrow boards with clean, even gaps. |
| Board-on-board | Overlapping boards with cap and trim. |
| Shadowbox | Alternating boards with light and airflow. |
| Three-point picket | Open pickets with a three-point profile. |
On a phone, swipe the row of cards sideways to see every style. On a computer, the cards sit in a grid.
Open a style
Select a card to open its stains. The heading changes to Choose a wood stain. Select ‹ All finishes to return to the styles.
Each style asks for the same construction every time you render it, so trying a new stain changes the color and wood look rather than the design. Details such as board spacing can still vary from one render to the next. To see a different build, go back and choose another style.
What the style does not decide
Height, gate locations, post material and hardware come from your contractor's quote and on-site measure. The picker notes that generated previews are illustrative and that the on-site measure decides the final spec.
Render photo stays unavailable until you select a stain. You can still change the line first with Edit fence placement.