Walkthrough videos
A walkthrough turns a finished fence preview into a short clip with a slow camera move toward your new fence. Video is available only on visualizers with the feature enabled.
Start a video
There are two entry points:
- Render photo + video creates a still preview first, then a walkthrough.
- Actions > Render video creates a walkthrough from the finished preview on screen.
Some sites ask you to sign in before rendering video. Select the sign-in link, finish signing in in the new tab, then return to the visualizer. Your photo, fence line and stain stay in the original tab.
Set the clip length and prompt
Some visualizers open Walkthrough settings before rendering. Others start a clip with their default settings.
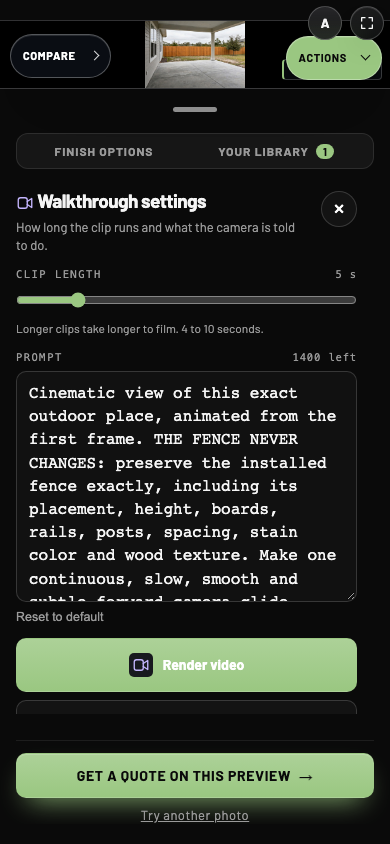
- 1Clip length
Move the slider within the range shown under it.
- 2Prompt
The camera direction. The default keeps your fence exactly as rendered.
| Control | How to use it |
|---|---|
| Clip length | Drag the slider. The minimum and maximum are shown under it. |
| Prompt | Edit the camera direction. The count shows how many characters are left. |
| Reset to default | Restore the default prompt after editing it. |
| Render video | Film the finished preview on screen. |
| Render photo + video | Create the photo, then film it. |
| Back to finishes / close | Leave settings without starting a render. |
The default prompt asks for one slow, smooth forward glide that keeps the fence exactly as rendered, including its placement, boards, posts and stain color. For most yards, keep it. If you edit it, keep the fence as the subject, for example: "Glide slowly toward the fence, keeping the whole run in view."
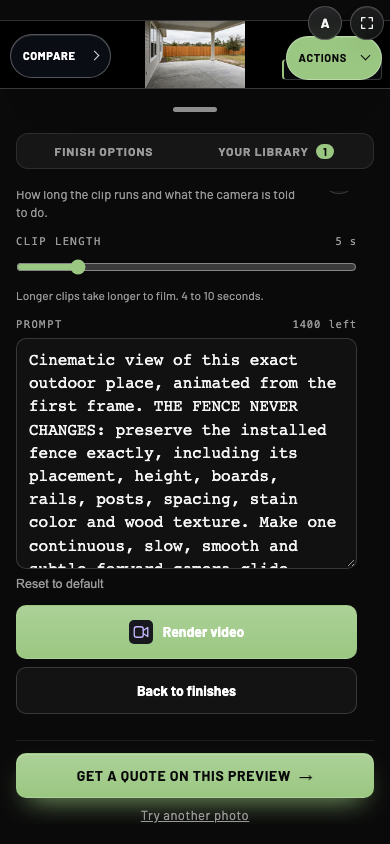
- 1Reset to default
Restore the original camera prompt.
- 2Render video
Start filming with these settings.
While the clip is filming
Filming your walkthrough appears on the preview while the clip is made. Clips can take several minutes, and longer clips take longer. You can keep looking around in the meantime. Avoid starting the same video again. When Library is enabled, check its in-progress work if you come back after leaving.
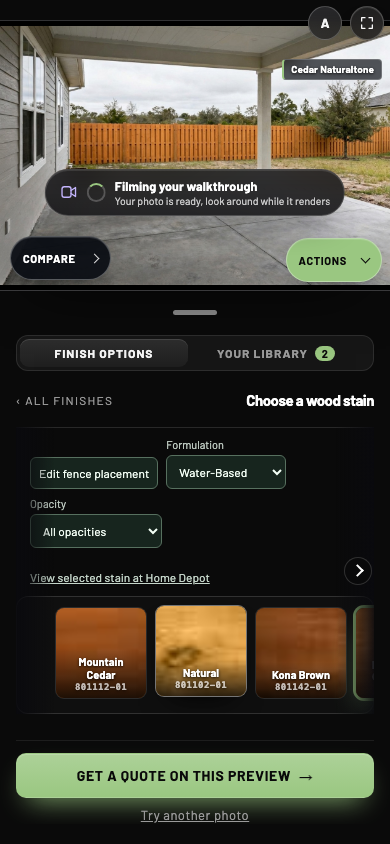
- 1Filming status
Keep the visualizer open while the walkthrough is prepared.
Play, switch and export
When the walkthrough is ready, Photo and Video appear at the top of the preview. Select Video to play the clip and Photo to return to the still. These switches reuse the saved result and do not render again.
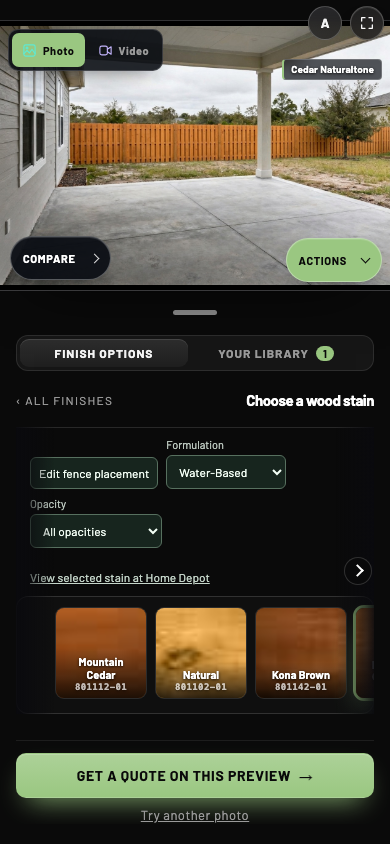
- 1Photo and Video
Switch between the still preview and its walkthrough.
With the video on screen, select Export walkthrough in Actions to download it or open your device's share sheet. When the still is visible, export saves the photo instead.
If filming fails, read the message shown. A sign-in request, a feature that is not enabled or a used-up allowance needs a different fix than a temporary error. See troubleshooting.