Your first fence preview
Start with a photo of your yard. The visualizer walks you through three steps: your photo, where the fence goes, and the style and stain.
1. Add a photo of your yard
Open the visualizer on your contractor's website. Select Upload photo and choose a picture, or drag a photo onto the upload area on a computer. On a phone, tap Take a photo to use the camera.
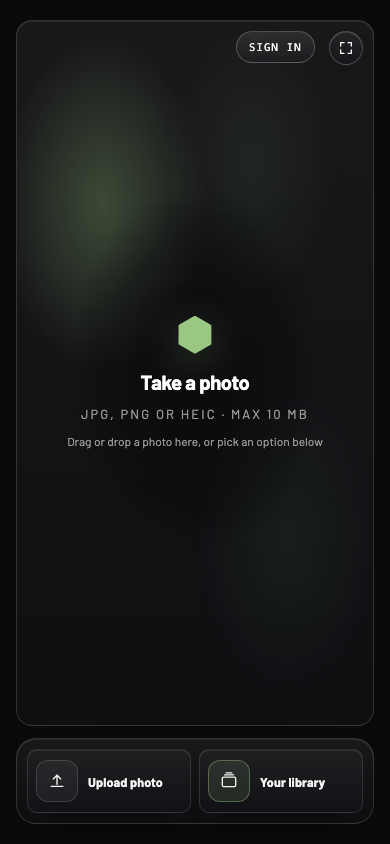
- 1Photo area
Drop a photo here on a computer, or tap to take one on a phone.
- 2Upload photo
Choose a yard photo that is already on your device.
- 3Your library
Return to earlier previews when this feature is enabled.
2. Draw the fence line
The photo opens in Where should the fence go? Tap each corner along the ground where the fence should stand, or drag your finger or mouse to draw. Add the approximate length in feet if you know it, then select Use this fence line. Prefer not to draw? Select Choose placement for me.
See Place your fence for tips on drawing a good line.
3. Choose a style and a stain
Select one of the five fence styles, then a stain color. Use Formulation and Opacity to narrow the stain list. The selected stain's name appears above the render button.
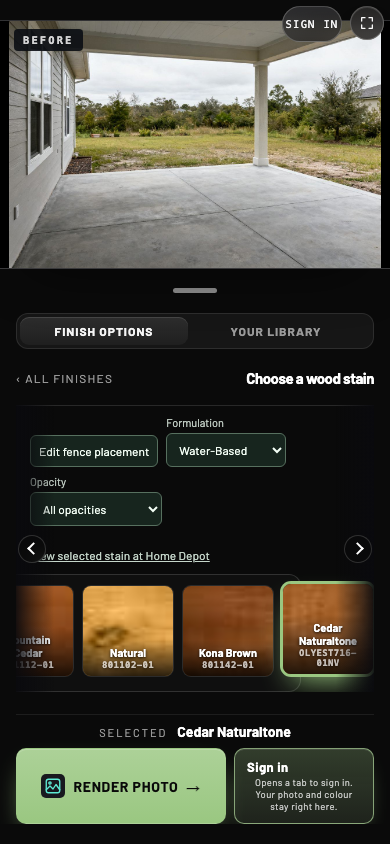
- 1Selected stain
The highlighted tile is the stain the next render will use.
- 2Product page
Open the selected stain's product page at Home Depot in a new tab.
- 3Render photo
Create the fence preview on your photo.
4. Render your fence
Select Render photo. Some versions label this Generate preview. A photo render usually takes about 15 seconds. The fence appears along your line in the chosen style and stain.
Selecting another stain does not change the photo by itself. When the button says Render photo, select it to create that version.
5. Explore the result
Open Actions > Show before and after, then drag the divider to see your yard with and without the fence. Open Actions to enlarge or export the image. Try another stain on the same fence line to compare alternatives.
When Your library is enabled, finished previews are saved automatically when browser storage is available. Export the image if you want your own copy.
6. Take the next step
Select Get a quote on this preview to send your fence to the contractor. Depending on the website, this opens a quote form inside the visualizer or the contractor's own website.